What you will learn:
Prerequisites:
* You can download the completed source files
from here:
version1 (arrays)
version 2 (xml)
sample.xml
Making a quiz with randomized options in AS3
So here we go. We want to make a quiz in Flash AS3 where the options are randomized. We may also want the questions to come up in a random order. What’s more, we may want to reuse our code for further quizzes. How can we do all this? The answers are right here in this tutorial. Read on.
Step 1
People have a funny habit of making tiny little Flash movies. But we want our quiz to be big and exciting. Open up Flash and modify the stage size to 600 x 800. This way, we get a nice big stage, but it will still display on laptop screens:

Fine. Save the file under the name ‘quiz.fla’ and let’s move on.
Step 2
We need some sample questions for the purpose of the tutorial. We should have about four, I think, so here they are:
Question 1: Where is Seoul?
Right Answer: South Korea
Wrong Answer: Japan
Wrong Answer: North Korea
Question 2: Where is Bucharest?
Right Answer: Romania
Wrong Answer: Hungary
Wrong Answer: Poland
Question 3: Where is Copenhagen?
Right Answer: Denmark
Wrong Answer: Sweden
Wrong Answer: Finland
Question 4: Where is Lima?
Right Answer: Peru
Wrong Answer: Argentina
Wrong Answer: Chile
Now, we need to find a way to get the questions in a form that Flash can read. We will look at two ways of doing this:
1 Storing the info in an array
2 Loading the questions from XML
The first option is the easiest, but the second option gives more flexibility. If you are a beginner to AS3 or if you do not need to worry about reusing programming code, stick to the array. Otherwise, check out how to use XML.
Now jump to step 4 if you want to get into the XML, otherwise proceed to step 3.
Step 3
A great way to store data is to put it in an array. In Flash, we can create an array like this:
var names:Array=["Jon","Tony","Ralph"];
Then we can refer to the data as names[0], names[1], names[2]. Try it:
var names:Array=["Jon","Tony","Ralph"];
trace(names[2]);
The program should output Ralph.
By the way, we are going to put all our code on the main timeline for this tutorial. This is not considered cool by advanced programmers, who like to stick everything in external .as files, but we’re going to do it anyway.
So on the main timeline, and in the first frame, add the following to a layer named data:
var questions:Array=["Where is Seoul? ","Where is Bucharest? ","Where is Copenhagen? ","Where is Lima? "];
That’s our array done to hold our questions. Now for the answer options, we will use a slightly more advanced technique: an array of arrays. That means we will hold our three options for each question in an array like so:
["South Korea","Japan","North Korea"]
And we will store all these arrays as a ‘master array’, like so:
var answers:Array=[ ["South Korea","Japan","North Korea"], ["Romania","Hungary","Poland"], ["Denmark","Sweden","Finland"] ,[ "Peru","Argentina","Chile"] ];
Now we can access our questions in the following way: The correct answer for question 2 is answers[1][0]. The dummy answers are answers[1][1] and answers[1][2]
Question 2 is referenced by answers[1] because the first entry in an array is identified as 0, not 1. Try the following traces:
trace(questions[1]);
trace(answers[1]);
trace(answers[1][0]);
trace(answers[1][1]);
trace(answers[1][2]);
Now that we have stored our question data, move on to Step 4 to see how we could do this using XML or move on to Step 5 to set up the interface.
Step 4
In Step 3, we learned how to store our questions and answers in an array. Now we will load the questions and answers in from an external XML file and store them in the same arrays.
First, we need an XML file, obviously. You don’t need any special software for this; you can simple write the XML into a wordpad document or text document and then change the file extension to XML.
So open a word pad document and type out the following:
<all>
<ques>
<q1>Where is Seoul?</q1>
<op1>South Korea</op1>
<op2>North Korea</op2>
<op3>Japan</op3>
</ques>
<ques>
<q1>Where is Bucharest?</q1>
<op1>Romania</op1>
<op2>Hungary</op2>
<op3>Poland</op3>
</ques>
<ques>
<q1>Where is Copenhagen?</q1>
<op1>Denmark</op1>
<op2>Sweden</op2>
<op3>Finland</op3>
</ques>
<ques>
<q1>Where is Lima?</q1>
<op1>Peru</op1>
<op2>Argentina</op2>
<op3>Chile</op3>
</ques>
</all>
Now save this as sample.xml. The beauty of XML is that it can be read easily by various programs running in flash, php, javascript and so on, but it can also be read by humans. For example, looking above, it is easy to see that the label <ques> refers to a question and <op1> refers to the first option, which we will use to store the answer. These labels are called nodes.
Let’s load the data into Flash. To do this, we need a few lines of code:
var loader:URLLoader = new URLLoader();
loader.addEventListener(Event.COMPLETE, loadXML);
loader.load(new URLRequest("sample.xml"));
function loadXML(e:Event):void
{
var myxml = new XML(e.target.data);
trace(myxml);
}
The above code first creates a URLLoader, then adds a ‘listener’ that checks when the loader has completed its job. The third line requests that the loader gets data from our file, sample.xml. The fourth line begins a function that will run when the data is loaded (as called from line 2). Inside this function, we declare a variable to hold the info and then run a trace to check it is working. Once you are sure it is working, you can remove the trace.
What is happening now is that we have the data loaded into our flash movie and we want to manipulate it so that we can stick it into an array. Let’s do it.
We need to define two empty arrays, one to hold the questions and one to hold the answer options:
var questions:Array=new Array();
var answers:Array=new Array();
Put this code before the previous code.
Next, we need a way to populate the arrays with the data. Replace the line trace(myxml); with the following:
var loop =myxml.ques.length();
for (var i=0;i<loop;i++){questions[i]=myxml.ques[i].q1;
answers[i]=[myxml.ques[i].op1,myxml.ques[i].op2,myxml.ques[i].op3];
}//loop
gotoAndPlay(2);
Okay, some explanation is necessary. We want to run a loop as many times as we have questions in our XML document. We can find out how many questions there are with myxml.ques.length and we set a variable loop equal to this.
As flash loops, the value i will increase. We want questions[0] to be the first question from the xml and questions[1] to be the second one and so on. We can do this using questions[i]=myxml.ques[i].q1; You can notice that we read the data in an xml node in a similar way to how we read an array.
We want our answers array to be a multidimensional array (see step 3). So we use this line:
answers[i]=[myxml.ques[i].op1,myxml.ques[i].op2,myxml.ques[i].op3];
Hence, answers[1] = [Romania, Hungary, Poland];
If this seems confusing, try tracing the data and you will get the hang of it soon enough.
The last line takes us to frame 2, now that the data is all loaded and our quiz is ready to go.
Let’s double-check your code is all correct:
var questions:Array=new Array();
var answers:Array=new Array();
var loader:URLLoader = new URLLoader();
loader.addEventListener(Event.COMPLETE, loadXML);
loader.load(new URLRequest("sample.xml"));
function loadXML(e:Event):void
{
var myxml = new XML(e.target.data);
var loop =myxml.ques.length();
for (var i=0;i<loop;i++){questions[i]=myxml.ques[i].q1;
answers[i]=[myxml.ques[i].op1,myxml.ques[i].op2,myxml.ques[i].op3];
}
gotoAndPlay(2);
}
stop();
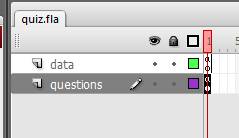
Add another layer to the timeline and name it Questions. Make sure the questions layer is below the data layer. We’ll place the rest of our code here.
If you are loading the data via xml, put this layer on the second frame:
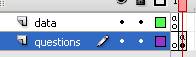
(We wish to make sure the xml is loaded before displaying the questions, or we will have a nasty ‘undefined’ message and other errors. The quick and dirty way of doing this is putting the questions on the next frame. )
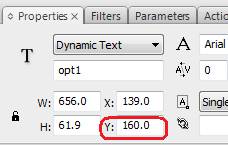
We need to display our questions, so let’s add some dynamic text fields to the stage. Here’s how I did mine:
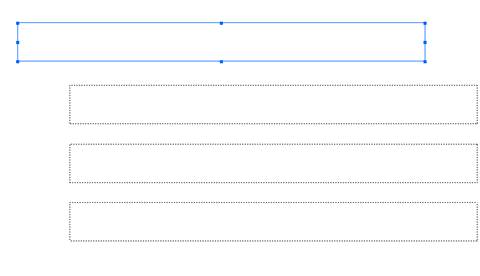
I labeled the text in the first box as simply q, and the text in the other boxes as opt1, opt2 and opt3:

The y-position of the boxes will be important later on (so we know where to position the ticks and crosses). It is also important for aesthetics for the boxes to be evenly spaced. My text boxes (for the answer options) are at 160, 260 and 360:
Now, before we look at displaying the questions and answers randomly, let’s do a version where we cycle through the questions in the order they are in the database. We will need the following code:
var qno=0;
function change_question(){
q.text=questions[qno];
opt1.text=answers[qno][0];
opt2.text=answers[qno][1];
opt3.text=answers[qno][2];
}//function change_question
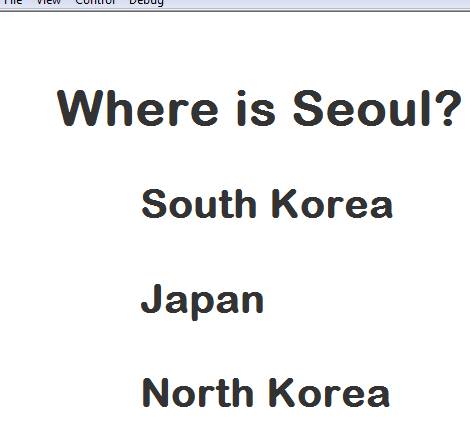
change_question();
This code basically sets the current question number and sets the text boxes according to the data in our arrays in a function named change_question. When you play the Flash movie, you should see this:
Obviously this is no good because the first option is always going to be correct. We need to mix it up a bit. Let’s randomize the questions. We need to change the code in our function to this:
var qno=0; var rnd1;
function change_question(){
rnd1=Math.ceil(Math.random()*3);
q.text=questions[qno];
if(rnd1==1){opt1.text=answers[qno][0];opt2.text=answers[qno][1];opt3.text=answers[qno][2];}
if(rnd1==2){opt1.text=answers[qno][2];opt2.text=answers[qno][0];opt3.text=answers[qno][1];}
if(rnd1==3){opt1.text=answers[qno][1];opt2.text=answers[qno][2];opt3.text=answers[qno][0];} }//function change_question
change_question();
We declare a new variable called rnd1. Then we assign a random number between one and three to rnd1 using the line: rnd1=Math.ceil(Math.random()*3);
The way it works is this: Math.random()returns a number at random between 0 and 1. Math.random()*3 gives us a random number between 0 and 3. We use Math.ceil to round our number up so that we get a whole number. To cut a long story short, if you want a random number out of 10, replace the 3 with a 10 and so on.
We use our random number to generate one of three different answer patterns. Now the correct answer could be option 1, option 2 or option 3. Run the movie a few times to observe that the options are different each time.
Step 6
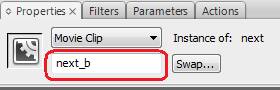
We need a button to change the questions for us. Draw a button on the stage below the text boxes. Right-click on it and choose convert to symbol, then choose button as the symbol type. Here is mine:

Give the instance on the stage the name ‘next_b’.
Now we need to add a ‘listener’ to listen for when the button is clicked and we need a function to run when the button is clicked. Here is how we do that:
Adding a listener:
next_b.addEventListener(MouseEvent.CLICK, ButtonAction1);
Defining the function ButtonAction1:
function ButtonAction1(eventObject:MouseEvent) {qno++;change_question();}
These two lines of code should come after the previous code. qno++ increases the variable qno by one and then we run the function change_question(). You should see that as you press the NEXT button, we cycle through the four questions.
Up until now, we have only been displaying the questions. We need to give the user the option to click on the answers and receive feedback on whether the choice is correct or not. Let’s do that in Step 7:
Step 7
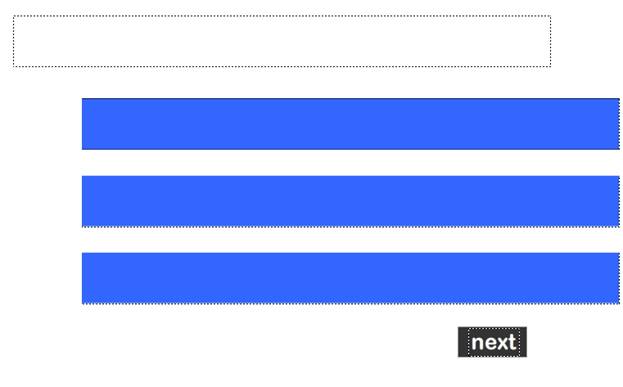
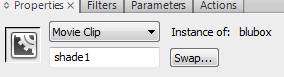
Draw a blue box directly on top of each dynamic text box and convert each one to a movie clip (make sure you don’t select the text box by accident). Give them the names shade1, shade2 and shade 3. Here is what I have now:
Change the alpha value of each one to 14%. This makes each movie clip mostly transparent.

Now we need to add a piece of code that basically says, ‘If you click on option 1 and the answer is 1, display a tick. Otherwise display a cross. Oops! We need to draw a tick and a cross first. Here are mine:
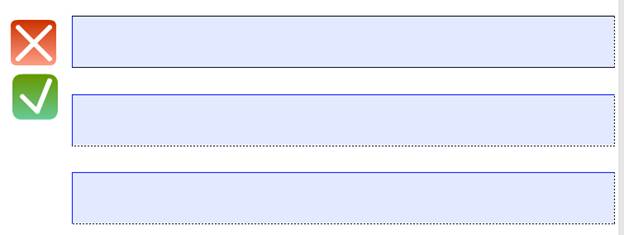
For the moment, the y-position is not important, but you should position them where you want them to appear on the screen in regard to the x-position. Just beside the options should be fine. Make sure the cross has the instance name ‘cross’ and the tick has the instance name ‘tick’.
We need to make the tick and cross invisible until you click on an option. So after the line where we declare our variables (that’s line 2), add:
tick.visible=false;cross.visible=false;
We need to detect when an option is clicked, which means more listeners, of course:
shade1.addEventListener(MouseEvent.CLICK, ButtonAction2);
shade2.addEventListener(MouseEvent.CLICK, ButtonAction3);
shade3.addEventListener(MouseEvent.CLICK, ButtonAction4);
Now we need to perform a check when an option is clicked: is it the correct answer or not. We know from our previous code that if rnd1==1, option 1 is the correct answer; if rnd1==2, option 2 is the correct answer. We can use this when we check the answers:
function ButtonAction2(eventObject:MouseEvent) {if(rnd1==1){tick.visible=true;tick.y=shade1.y}else{cross.visible=true;cross.y=shade1.y}}
function ButtonAction3(eventObject:MouseEvent) {if(rnd1==2){tick.visible=true;tick.y=shade2.y}else{cross.visible=true;cross.y=shade2.y}}
function ButtonAction4(eventObject:MouseEvent) {if(rnd1==3){tick.visible=true;tick.y=shade3.y}else{cross.visible=true;cross.y=shade3.y}}
So we have told Flash to display a tick (by making it visible) if the right answer has been selected and to display a cross if the wrong answer has been selected. We have also positioned the tick/cross next to the option that was clicked.
Now we have some refinements to make. In our change_question() function, we need to reset the tick and cross to invisible before the next answer is chosen. We add this code to the first line of the function:
tick.visible=false;cross.visible=false;
In fact, now we don’t need the code on line 2, because it is repetitive.
The next refinement is that we want the options to ‘lock up’ after the user has chosen an answer. We can use the property ‘mouse.Enabled’ to do this. Let’s write a short function:
function enable_disable(a){
if(a==0){shade1.mouseEnabled=false;shade2.mouseEnabled=false;shade3.mouseEnabled=false;}
if(a==1){shade1.mouseEnabled=true;shade2.mouseEnabled=true;shade3.mouseEnabled=true;}}
So as we can see, if we call enable_disable(0), it will lock the options and if we call enable_disable(1), it will disable the options. We want to lock the options after an answer has been chosen and unlock the options when we change the question.
Here is all the code so far in the questions layer:
var qno=0;var rnd1;
tick.visible=false;cross.visible=false;
function change_question(){tick.visible=false;cross.visible=false;
rnd1=Math.ceil(Math.random()*3);
q.text=questions[qno];
enable_disable(1);
if(rnd1==1){opt1.text=answers[qno][0];opt2.text=answers[qno][1];opt3.text=answers[qno][2];}
if(rnd1==2){opt1.text=answers[qno][2];opt2.text=answers[qno][0];opt3.text=answers[qno][1];}
if(rnd1==3){opt1.text=answers[qno][1];opt2.text=answers[qno][2];opt3.text=answers[qno][0];}
}
function enable_disable(a){
if(a==0){shade1.mouseEnabled=false;shade2.mouseEnabled=false;shade3.mouseEnabled=false;}
if(a==1){shade1.mouseEnabled=true;shade2.mouseEnabled=true;shade3.mouseEnabled=true;}}
change_question();
next_b.addEventListener(MouseEvent.CLICK, ButtonAction1);
function ButtonAction1(eventObject:MouseEvent) {qno++;change_question();}
shade1.addEventListener(MouseEvent.CLICK, ButtonAction2);
shade2.addEventListener(MouseEvent.CLICK, ButtonAction3);
shade3.addEventListener(MouseEvent.CLICK, ButtonAction4);
function ButtonAction2(eventObject:MouseEvent) {enable_disable(0);if(rnd1==1){tick.visible=true;tick.y=shade1.y}else{cross.visible=true;cross.y=shade1.y}}
function ButtonAction3(eventObject:MouseEvent) {enable_disable(0);if(rnd1==2){tick.visible=true;tick.y=shade2.y}else{cross.visible=true;cross.y=shade2.y}}
function ButtonAction4(eventObject:MouseEvent) {enable_disable(0);if(rnd1==3){tick.visible=true;tick.y=shade3.y}else{cross.visible=true;cross.y=shade3.y}}
So far we have the ability to display the questions with the options randomized, navigate to the next question and check if the answer is right or wrong. The next step is to track the correct and incorrect answers and to display the score at the end of the quiz.
Step 8
To track the number of right and wrong answers, we’ll need more variables, so on line 3, add the following:
var right_answers=0;var wrong_answers=0;
And we have to amend a few lines to count the right and wrong answers. A quick and dirty way to do this is at the beginning of the change_question function. If the tick is visible, we know a right answer has been chosen. If a cross is visible, a wrong answer has been chosen:
if(tick.visible){right_answers++;}
if(cross.visible){wrong_answers++;}
This code is short form for something like this:
if(tick.visible==true){right_answers=right_answers+1;}
We will know when all the questions have been completed because the question number (qno) will be equal to the length of the array that holds the questions. What do we want to do when we reach the last question? We’ll go to an outro page that we will put on frame 2. So after the two lines of code we just added, let’s add another line:
function change_question(){
if(tick.visible){right_answers++;}
if(cross.visible){wrong_answers++;}
if(qno==questions.length){gotoAndPlay(2);}else{
tick.visible=false;cross.visible=false;
rnd1=Math.ceil(Math.random()*3);
q.text=questions[qno];
enable_disable(1);
if(rnd1==1){opt1.text=answers[qno][0];opt2.text=answers[qno][1];opt3.text=answers[qno][2];}
if(rnd1==2){opt1.text=answers[qno][2];opt2.text=answers[qno][0];opt3.text=answers[qno][1];}
if(rnd1==3){opt1.text=answers[qno][1];opt2.text=answers[qno][2];opt3.text=answers[qno][0];}
}}
Note the ELSE statement and the extra curly bracket on the last line. We are telling Flash to go to frame 2 if the questions are finished. Otherwise, continue as normal.
*If you are loading the data from xml, you need to replace gotoAndPlay(2); with gotoAndPlay(3);
Add a stop(); to frame 1, then insert a new frame and also add a stop(); Without the stop();, the movie will run on a constant loop.
On frame 2 (frame 3 if you’re using xml), add the following:
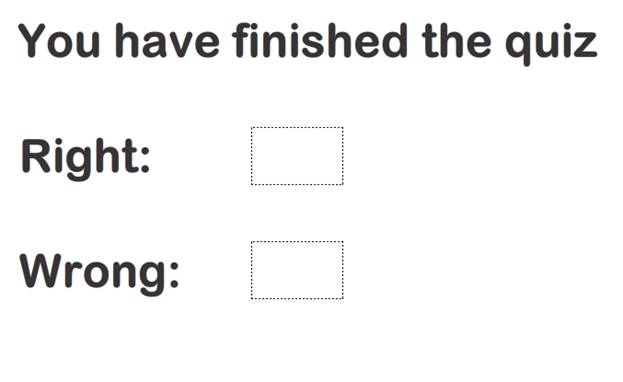
The two dynamic text boxes have instance names ra and wa respectively. We can add the following code to control their display:
ra.text=right_answers;
wa.text=wrong_answers;
Well, it looks like we’ve almost finished. I promised I would show how to randomize the order of the questions. Let’s do that in Step 9 and then we’re done.
Step 9
We wish to display the questions in a random order. There are many ways to do this, but I’ll show you a quick and dirty method that works a treat.
Declare a variable rnd2 in line one, then add the underlined code to our change_questions() function:
function change_question(){
if(tick.visible){right_answers++;}
if(cross.visible){wrong_answers++;}
if(qno==questions.length){gotoAndPlay(2);}else{
tick.visible=false;cross.visible=false;
rnd1=Math.ceil(Math.random()*3);
rnd2=Math.ceil(Math.random()*questions.length)-1;
q.text=questions[rnd2];
if(questions[rnd2]=="x"){change_question();}
questions[rnd2]="x";
enable_disable(1);
if(rnd1==1){opt1.text=answers[rnd2][0];opt2.text=answers[rnd2][1];opt3.text=answers[rnd2][2];}
if(rnd1==2){opt1.text=answers[rnd2][2];opt2.text=answers[rnd2][0];opt3.text=answers[rnd2][1];}
if(rnd1==3){opt1.text=answers[rnd2][1];opt2.text=answers[rnd2][2];opt3.text=answers[rnd2][0];}
}}
We have four new lines of code:
rnd2=Math.ceil(Math.random()*questions.length)-1;
This chooses a random number of the length of the array that holds our questions. (But minus 1, because we count the elements in an array from 0.)
q.text=questions[rnd2];
We use our random number to choose a question at random.
questions[rnd2]="x";
Once the question is chosen and displayed, we change the data in the array to “x”, so that we have a way to know which questions have already been displayed. Changing the data to “x” is a lot less bother than removing the element from the array for reasons I won’t go into here.
if(questions[rnd2]=="x"){change_question();}
If we choose a question that has already been “x”ed, we simply run the change_questions() function again. When we call a function from within itself, this is called a ‘recursive’ function. This little technique saves us lines and lines of code.
Our quiz is ready! Check it out and make sure that it works. The full code for the questions frame is listed below. Remember that you can also download the .fla files from www.flashbynight.com/tutes/quiz.html
var qno=0;var rnd1; var rnd2;
tick.visible=false;cross.visible=false;
var right_answers=0;var wrong_answers=0;
function change_question(){
if(tick.visible){right_answers++;}
if(cross.visible){wrong_answers++;}
if(qno==questions.length){gotoAndPlay(2);}else{
tick.visible=false;cross.visible=false;
rnd1=Math.ceil(Math.random()*3);
rnd2=Math.ceil(Math.random()*questions.length)-1;
q.text=questions[rnd2];
if(questions[rnd2]=="x"){change_question();}
questions[rnd2]="x";
enable_disable(1);
if(rnd1==1){opt1.text=answers[rnd2][0];opt2.text=answers[rnd2][1];opt3.text=answers[rnd2][2];}
if(rnd1==2){opt1.text=answers[rnd2][2];opt2.text=answers[rnd2][0];opt3.text=answers[rnd2][1];}
if(rnd1==3){opt1.text=answers[rnd2][1];opt2.text=answers[rnd2][2];opt3.text=answers[rnd2][0];}
}}
function enable_disable(a){
if(a==0){shade1.mouseEnabled=false;shade2.mouseEnabled=false;shade3.mouseEnabled=false;}
if(a==1){shade1.mouseEnabled=true;shade2.mouseEnabled=true;shade3.mouseEnabled=true;}}
change_question();
next_b.addEventListener(MouseEvent.CLICK, ButtonAction1);
function ButtonAction1(eventObject:MouseEvent) {qno++;change_question();}
shade1.addEventListener(MouseEvent.CLICK, ButtonAction2);
shade2.addEventListener(MouseEvent.CLICK, ButtonAction3);
shade3.addEventListener(MouseEvent.CLICK, ButtonAction4);
function ButtonAction2(eventObject:MouseEvent) {enable_disable(0);if(rnd1==1){tick.visible=true;tick.y=shade1.y}else{cross.visible=true;cross.y=shade1.y}}
function ButtonAction3(eventObject:MouseEvent) {enable_disable(0);if(rnd1==2){tick.visible=true;tick.y=shade2.y}else{cross.visible=true;cross.y=shade2.y}}
function ButtonAction4(eventObject:MouseEvent) {enable_disable(0);if(rnd1==3){tick.visible=true;tick.y=shade3.y}else{cross.visible=true;cross.y=shade3.y}}
stop();
I hope you enjoyed the tutorial and be sure to check out some of my games on Flashbynight.com