home | blog | twitter | tutes | about

Tutorial: Creating a Fill-in-the-blank Quiz Using HTML5
What you will learn:
Prerequisites:
Required time:
1+ hours
Notes
This will be a great project for anyone starting out in HTML5 who wants a simple and fun project to build. It's also a good project for anyone who wants a fully customizable quiz for educational purposes. It’s a fill-in-the-blank quiz that we can put on a website! We can make it easy to extend and add questions to and we can even make sure it will work on a mobile phone. And if you just want to grab the source code without following the tutorial, then that’s fine, too - the link is directly below.
HTML
Step 1 - Setting up the HTML document
Although you could use Dreamweaver or similar software, to create an HTML document, you don’t need any special software, you can simply use any text editor such as Textpad or Wordpad. Open your text editor and type:
<!DOCTYPE HTML>This is the way that we begin all of our HTML5 documents. Now let’s fill out the document structure:
<!DOCTYPE HTML>

      <head>

     	<title>Quiz</title>

        <meta name=viewport content="width=device-width, initial-scale=1.0, maximum-scale=1.0, user-scalable=no">

      	<link href="main.css" rel="stylesheet" type="text/css"/>

      	<script src="jquery.js"></script>

      	<script src="controller.js"></script>

      </head>

      <body>

      	<div id="gameArea" tabindex="1"></div>

      </body>

</html>
That's all the HTML we need and we're good to go.
The <title> line controls what is shown on the browser tab as the title or description of the page. [3].
The following line controls the look and feel on mobile devices. We disable the pinch-to-zoom function because we will use code to ensure the page displays properly. [4].
The next line tells our page to look for a document called ‘main.css’ which will hold all of our style information (background colors and so on). [5].
The first <script> line tells the page to look for a JavaScript file called ‘jquery’. This is a standard JavaScript ‘extension’ widely used by developers to make JavaScript more powerful. We will not need to write this file ourselves. [6].
The second <script> line tells the page to look for a JavaScript file called ‘controller.js’. This is the file we will use to control the quiz. [7].
The body contains a single 'div' (dividing element) with the ID 'gameArea'. We will load our game and display it here. We have given this div a tab index so it can be selected by the mouse - the explanation will come later.
Save the document as index.html. Test it out by opening it in a browser* (right-click and choose Open With and choose a browser). There won't be anything to see yet.
*I recommend using Firefox for this tutorial. We will be using JSON which Chrome and some other browsers will not display if offline.
Project Management
Step 2
So we know that we will need the following files to build our project:
- index.html, which we have already done.
- main.css, which will hold the style information
- jquery.js, which will enhance standard JavaScript
- controller.js, which will control the game
- data.json, which will hold our questions and answers
All of these files can be written or viewed in a text editor, just like index.html, so there’s no need for any special software.
In addition, we will have the following graphical assets:
- upfeathers.png - our background image
- tick.png and cross.png - to display a tick or cross on the screen when the user has answered a question.
Database
Step 3 – Build a question database
Create a file in your text editor named data.json. Then open it up and type in the following:
    {"quizlist":[

	{
		"question":"France",
		"response":"Paris"
	},

	{
		"question":"Japan",
		"response":"Tokyo"
	},
	{
		"question":"Spain",
		"response":"Madrid"
	},
	{
		"question":"Russia",
		"response":"Moscow"
	},
	{
		"question":"Italy",
		"response":"Rome"
	}

]
}
This is a JSON file and it holds data in groups. We can use it to hold our question database. You’ll notice that it is easily readable by either machine or human. You'll notice that our sample quiz is a test of capital cities.
Each JSON element holds a question and a response.
Later, if we wish to change or add any words, this is the only file we will need to modify. We can add as many questions as we want – we will program the game to know when to stop. That means our game can be recycled and can even also edited by someone with very little technical expertise.
*Note that you will need to make sure that you stick very carefully to the format with JSON files. A missing or extra comma, for example, can cause problems.
Save the file and continue.
Step 4 – Gather assets
You will need some external assets.
The first one is the JQuery file. You can either get it from the source files in the link below (or at the top of this page) or if you want the latest version, you could download it from jquery.com. I am using version 1.9.1. If you use a later version, be sure to shorten the name to jquery.js
Secondly, we need three images. The first is our background image, which I downloaded from the excellent subtlepatterns.com. You can substitute your own image if you like. Next, we need a tick and a cross. Again, you can substitute your own, but you'll want to ensure they are the same size as the ones provided below (30x30px).


You could right-click on the images to save them, or you could grab them from the link below.
Source files: click here
CSS
Step 5 – Build a style sheet
We will use a CSS file to control the look and feel of our quiz. Later if we need to modify the look and feel, we need only modify the CSS file.
Create a document entitled main.css and open it with any text editor.
body {

      background-image:url(upfeathers.png);

      font-family:Arial, Helvetica, sans-serif;

      }
This sets the background image as upfeathers.png, which is in the same folder as our other files. It then sets the preferred fonts for any text on the page.
#gameArea{
	width:800px;
	margin:auto;
	margin-top:50px;
	font-size:13px;
	padding:4px;
	background-color:white;
 	min-height:300px;
}

#wordBox{
	border:2px #69F solid;
	border-radius:3px;
	margin-left:10px;
	padding:10px;
	width:300px;
}

#inputBox{

	border:2px #69F solid;

	border-radius:3px;

	margin-left:10px;

	padding:10px;

	width:300px;

	float:left;

}
#gameArea is where our entire quiz activity will go. We set a width of 800px and a minimum height of 300px. We want an automatic margin at the sides, which means it will be horizontally centered on the page. We set a top margin of 50px which also leaves space for a banner or anything you wish to place at the top of your page. [1-9]
#wordBox is going to be where our initial question prompt will go, which will be the names of the various countries in this case. We want a box with a blue border. Setting the border-radius to 3px will give slightly rounded edges to the box. [11-17]
Then, #inputBox contains the styling information for our text input box. Again, we want a blue border with rounded edges. We 'float' the box to the left so that our feedback tick or cross will appear to its right. [19-26]
@media screen and (max-width:800px){
	#gameArea{
		width:96%;
		padding:2%;
	}
}

@media screen and (max-width:400px){
	#wordBox{
		width:200px;
	}
	#inputBox{
		width:200px;
	}
}
Here is where we ensure everything looks good on smaller screens using a technique known as media queries. We previously set the width of our game area to 800px, which will cause issues if the user's screen is less than 800px wide. Hence we set a rule that if the screen is less than 800px, we define the width of the game area as 96% of this, with a little padding of 2% on each side. [1-6].
Smaller phone screens can be around 320px wide. Our text input box is 300px wide before taking into account margins and the width of the tick/cross to be displayed to its right. Hence, we will reduce the widths of #wordbox and #inputBox to 200px for screen widths of 400px and less.[8-15]
That will do for the CSS. You can open the index.html file in a browser and see how the page looks.
Javascript
Step 6 – Creating the JavaScript code
Before we get down to the code, we should take a minute to think about how the quiz should work:
1 We will display a line of instructions followed by a question in a box, followed by an input box. The user then types the answer and presses ENTER
2 A tick or cross appears and the input box turns red or green accordingly. If the wrong answer has been chosen, the right answer is displayed.
3 The user can then press ENTER again to clear the screen and see the next question.
4 When all the questions are finished, we display the score and a message. At this point, the user can press ENTER to begin the quiz again.
5 Special consideration 1: The user should be able to tap the screen instead of pressing ENTER, since some users may be on mobile devices.
6 Special consideration 2: When doing the quiz on a mobile device, the user may be prompted to use the autocomplete function. The autocomplete function adds a space after the inputted word. Hence, we need to accept the answer if there is an extra space.
We can break down our code into five parts:
1 Load the quiz data
2 Display the question
3 Update the question
4 Check the answer/give feedback
5 Control the game flow
Create a document called controller.js, save it and open it with a text editor or other program.
$(document).ready(function () {


    });
This is how we begin and all of our code will fall between these two lines. It basically says that we will do the following as soon as the document is ‘ready’ in the browser.
We’ll begin by defining the various variables we will need to use throughout the game:
	var questionBank=new Array;
	var currentQuestionNumber;
	var currentAnswer;
	var numberOfQuestions;
	var gamePosition;
	var score;
We will always try to keep our variables ‘human and machine readable’. For example, we can see the variable currentAnswer refers to the answer to the current question. Following this principle makes it really easy to read your code. If anyone else needs to read your code, they'll thank you.
The first variable is an array - a series of variables. In this case, we will use questionBank to hold all the questions and answers to our quiz.
currentQuestionNumber will store... well, the current question number, and so on.
We will use the variable gamePosition to control the flow of the game.
These are the global variables - used throughout the code. We will also have some local variables (used in only one function) which we will define later.
Right then, we need to get the data from our JSON file into a useable format in controller.js. Here’s how:
$.getJSON('data.json', function(data) {
numberOfQuestions=data.quizlist.length;
for(i=0;i<data.quizlist.length;i++){
typeArray=[];
typeArray[0]=data.quizlist[i].question;
typeArray[1]=data.quizlist[i].response;
questionBank[i]=typeArray;
}
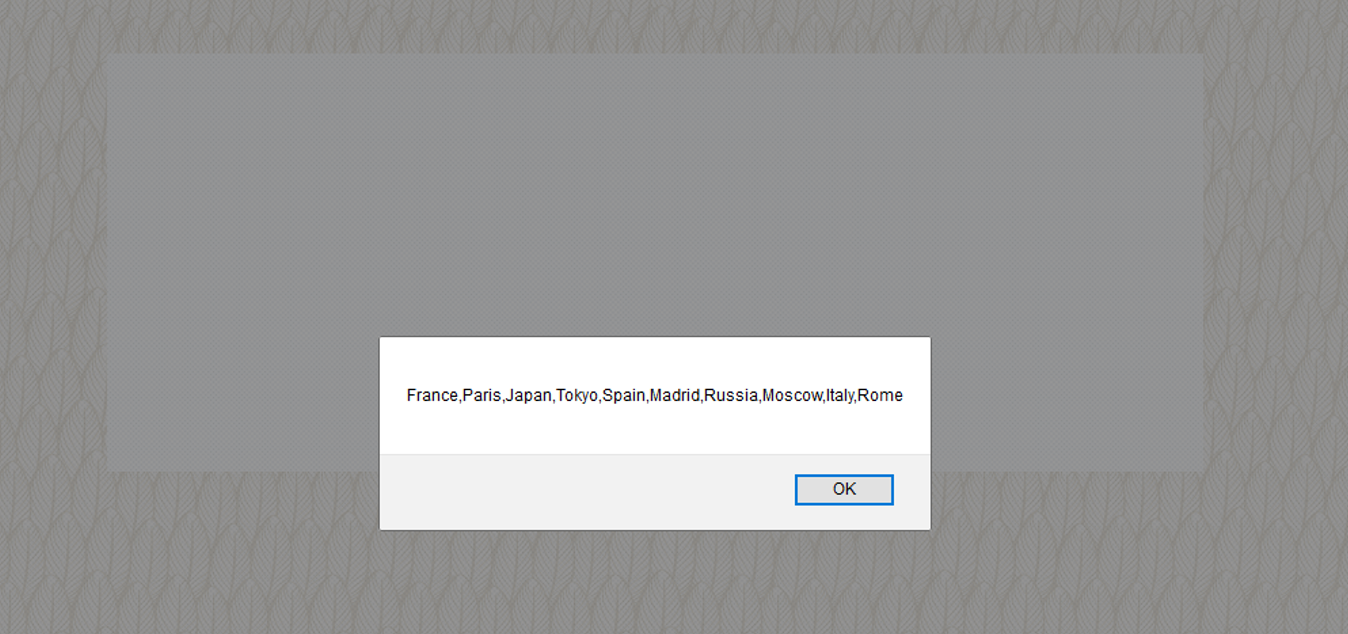
alert(questionBank);
gamePosition=1;
resetGame();
updateQuestion();
})//getJSON
We use the command $.getJSON to read our JSON data and call a function to format it. The $.getJSON() command is an example of a function from JQUERY. Without our JQUERY extension, we would not be able to use this code. Code that begins with a ‘$’ references JQUERY.
We loop through all the JSON elements inside the quizlist element, i.e. all of our words and clues. Then we use the data to form an array of information called questionBank. We are using a two-dimensional array here - we form a temporary array called typeArray and then we store these in series inside the questionBank array.
Line [9], alert(questionBank); is only for testing; it will display the contents in an alert (pop up) window so that we can ensure everything is working so far.
Now would be a good time to test the app. Right-click on index.html and open it in Firefox, or Internet Explorer. You should see a pop up window displaying the contents of the database, as shown below. If not, review the code so far to check for mistakes. If it works, delete this line as it will disrupt the game.
Line [11] calls a function to reset the game, which we will do next, and Line [12] calls a function to update the current question.
Step 7 – Displaying the game screen
function resetGame(){
currentQuestionNumber=0;
score=0;
$("#gameArea").empty();
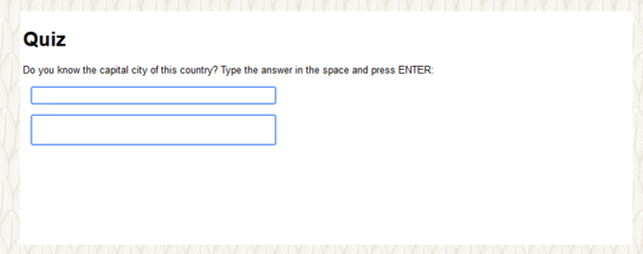
$("#gameArea").append('<h1>Quiz</h1>');
$("#gameArea").append('<p>Do you know the capital city of this country? Type the answer in the space and press ENTER:</p>');
$("#gameArea").append('<p id="wordBox"></p>');
$("#gameArea").append('<input type="text" id="inputBox">');
$("#gameArea").append('<div id="feedback"></div>');
$("#gameArea").append('<p id="message"></p>');
}//reset game
First, we reset the current question number and the score (lines[2-3]), then we make sure the #gameArea div is empty [4].
Next, we use the .append() command to add content to the #gameArea div. As you can see, we add the instructions, a space to put our question, a space for the text input box, a space for the feedback (tick or cross graphic) and a space for a message.
Open the index.html file again in a browser - you should see the following:
Well, okay, so now we need to create a function which will fill in the question:
function updateQuestion(){
   $('#wordBox').empty();
   $('#wordBox').append(questionBank[currentQuestionNumber][0]);

   $('#message').empty();
   $('#feedback').empty();

   $('#inputBox').empty();
   $('#inputBox').prop("disabled",false);

   $('#inputBox').val('');
   $('#inputBox').css("background-color","white");

   $('#inputBox').css("color","black");
   $('#inputBox').focus();
   $("#inputBox").click(function(e) {e.stopPropagation();});

   currentAnswer=questionBank[currentQuestionNumber][1];
   currentQuestionNumber++;
   gamePosition=1;
}//updateQuestion
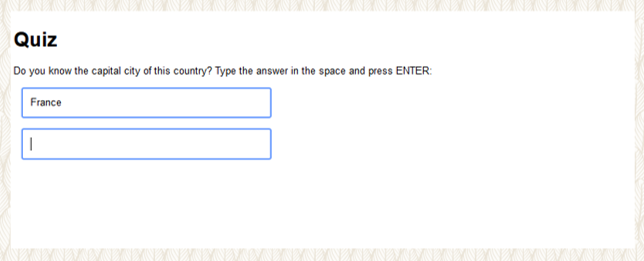
Line [2] makes sure the #wordBox div is empty - yes, it is already empty at the start of the game, but we wish to call this function between every question. We then add the current question [3], which is held in our array at this positon: questionBank[currentQuestionNumber][0] - note that currentQuestionNumber=0 at the beginning of the game, arrays in Javascript are zero-indexed.
Next, we empty the other divs. [4-6]. We will disable the input box between questions, so we enable it again on line [7]. We set the value of the input box to ' '(nothing), on line [8]. We reset the color scheme, lines [9-10]. We make sure the cursor is focussed on the input box. [11]. Finally, we do not want to enter the answer when the user clicks or taps the input box itself (i.e. to open the virtual keyboard on a mobile device), so we disable the click function with the stopPropagation commend. [12.]
We track the current answer, which we will use to check if the user's answer is correct or not. [13].
We increase the current question number. [14].
We ensure the game position is set to 1. (We will get to this in a moment.)
You should always test regularly when coding, so let's test here. You should see the following:
Step 8 – Capturing input
Let's add code to capture when the user presses the ENTER key or when the user taps or clicks the screen:
$(document).on("keyup",function(e){
	if(e.which==13){gameControl();};
});

$("#gameArea").on("click tap",function(){
		gameControl();
});//tap
First we capture when the user releases a key [1]. Each key has a corresponding code and the ENTER key is 13. Thus, if the ENTER key has been pressed, we wish to call our game control function.
Similarly, we wish to call our game control function if the game area of the screen is tapped or clicked [5-7]. (Some mobile devices may register 'click' when you tap the screen.)
We have referenced our game control function, but we have yet to write it. Let's do that now:
function gameControl(){
	switch (gamePosition) {
		case 1:
			checkAnswer();
			break;
		case 2:
			updateQuestion();
			break;
		case 3:
			scorePage();
  			break;
		case 4:
			resetGame();
			updateQuestion();
			break;
	}//switch
}//gamecontrol
Here, we use a switch statement, which is more elegant and easier to read than using a series of 'if' statements. In the case where gamePosition=1, we check the answer; for gamePosition=2, we update the question; gamePostion=3 means all the questions have been finished so we show the score page; gameposition=4 means we wish to restart the game.
We can see from this that we have two more functions to write: checkAnswer() and scorePage().
function checkAnswer(){
	myAnswer=$('#inputBox').val();
	if(myAnswer.slice(myAnswer.length-1,myAnswer.length)==" "){
		myAnswer=myAnswer.slice(0,myAnswer.length-1);}
	if(currentAnswer==myAnswer){
		score++;
		$('#feedback').append('<img src="tick.png">');
		$('#inputBox').css("background-color","green");
		$('#inputBox').css("color","white");
	}
	else{
		$('#feedback').append('<img src="cross.png">');
		$('#inputBox').css("background-color","red");
		$('#inputBox').css("color","white");
		$('#inputBox').val($('#inputBox').val()+" (ans= "+currentAnswer+")");
	}
	$('#message').append('Press ENTER or tap the screen again to continue');

    $("#inputBox").prop('disabled', true);

    $("#gameArea").focus();

    gamePosition=2;

    if(currentQuestionNumber==numberOfQuestions){gamePosition=3;}
}//checkanswer
This function checks for the correct answer, provides feedback and checks to see if we have reached the last question.
First, we capture the input from the text box and store it in a variable called myAnswer [2]. Next, we check to see if there is an extra space at the end of the answer and slice it off if there is [3-4].
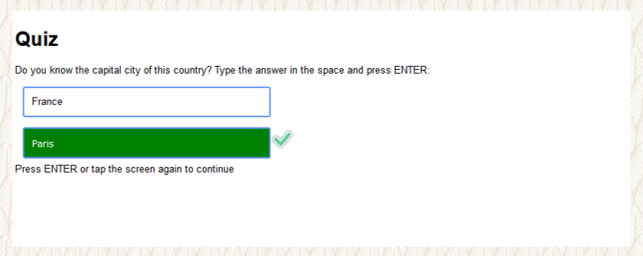
If the user's answer matches the current answer, we increase the score, display a tick and change the input box background to green with white text [5-10].
Or else (if the user's answer is wrong), we display a cross, change the background color to red with white text, and display the current answer for the user's convenience [11-16].
We display a message to the user to press ENTER or tap the screen to continue [17].
We disable the input box, so that the user cannot enter text at this point [18].
We shift the input focus to the entire #gameArea [19]. The reason that we do this is because with the input box disabled, when the user clicks ENTER to continue, it will not be captured if the focus remains on the input box. This is also the reason that we gave the gameArea div a tabindex value back in step 1 - anything with a tabindex can receive focus.
Finally, we set the game position to 2, so our game control function can respond accordingly [20]. However, if we have reached the final number of questions (ie, if currentQuestionNumber==numberOfQuestions), we set the game position to 3, ready to display the score page.
This would be a good point to test out what we have so far. Try entering a correct answer, an incorrect answer and an answer with an extra space. Try it on mobile, if you like.
You'll find that when you come to the final question, the quiz freezes. Of course, this happens because we haven't written the scorePage() function. That's the last thing on our list, so let's do it now:
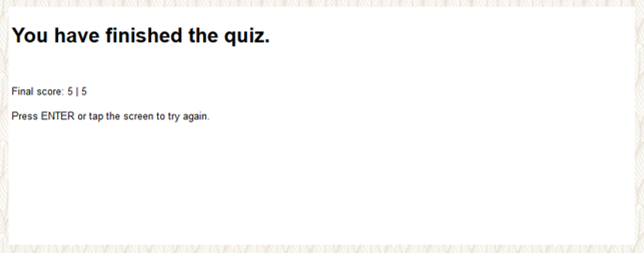
function scorePage(){
	$("#gameArea").empty();
	$("#gameArea").append("<h1>You have finished the quiz.</h1><br><br>");

    $("#gameArea").append("Final score: "+score+ ' | '+numberOfQuestions+'<br><br>');
    $("#gameArea").append("Press ENTER or tap the screen to try again.");
   gamePosition=4;

}//scorePage
We first empty our gameArea div [2], and then display our messages, including line[4], which displays the score.
Finally, we set the game position to 4, so that our game control function knows to reset the game.
Test again and confirm that the score page works:
Does it work? If so, then we're all done.
Troubleshooting and more resources:
1 When testing offline, Chrome will not read JSON files. Use Firefox for testing offline
2 Some webhosting services still do not recognise JSON. If your game works offline, but not on your server, this may be the case. Contact your hosting company and they may be able to update the settings for you. Click HERE for a version that does not use JSON.
3 For a version with an added function that randomises the order of the questions, click HERE.
I hope you enjoyed learning from this tutorial. There are plenty more tutorials at www.flashbynight.com/tutes.
These tutorials in particular will allow you to practice and refine the techniques used in building this quiz:
Creating a multiple choice quiz.
Creating a picture quiz.
Creating a hangman game.
We also have some great games for you at www.flashbynight.com so stop by and check them out.
If you like this tutorial or anything else on Flash By Night, please show your appreciation by mentioning it on Facebook, Twitter, Pinterest, StumbleUpon or any other favorite social media.